
")
Microprocessor controller OTRSP
- Details
- Category: Antenna
- Published: Wednesday, 12 June 2013 11:59
- Hits: 8690
The controller controls the antenna switch located on the roof. As much expanded version of the controller allows you to remotely control antenna by the controller or the computer. You can also transmit on a different antenna than to receive. Communication with the computer is using the latest protocol OTRSP (SO2R), which is available in Logger32, N1MM, etc.
Operation:
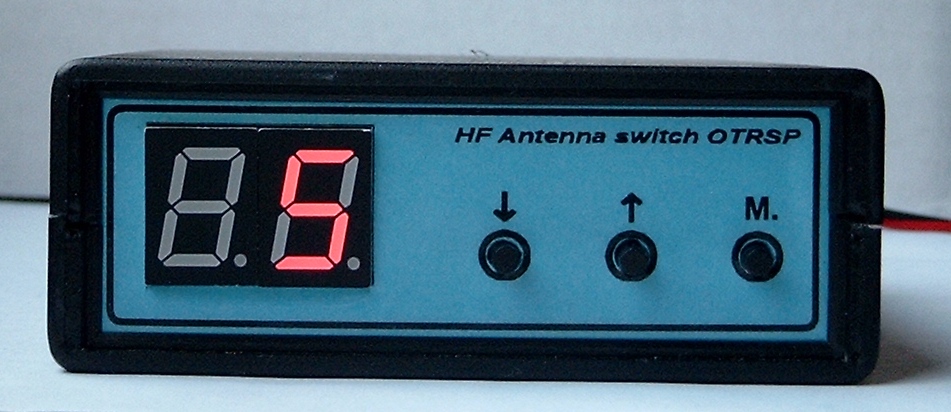
The controller is used for remote control antenna 1 to 8 with manual control, or by a computer. Pressing button up or down you can select the program from 1 to 24. Each program has programmed transmitting and receiving antenna. Pressing the M button you can check at any time - see no. program (orange), no. ant. receiving (green), no. ant. transmitting (red).
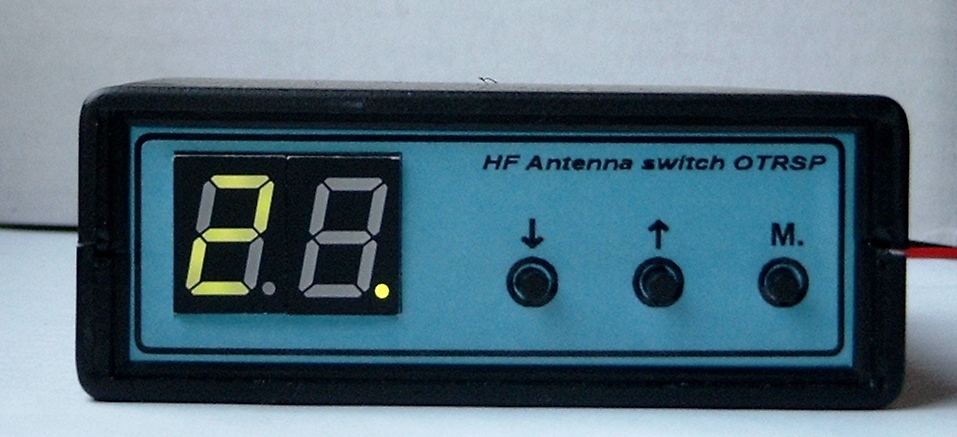
Pressing the M button for more than 2 sec switch the controller is switched to work with computer. The display illuminates an additional dot.
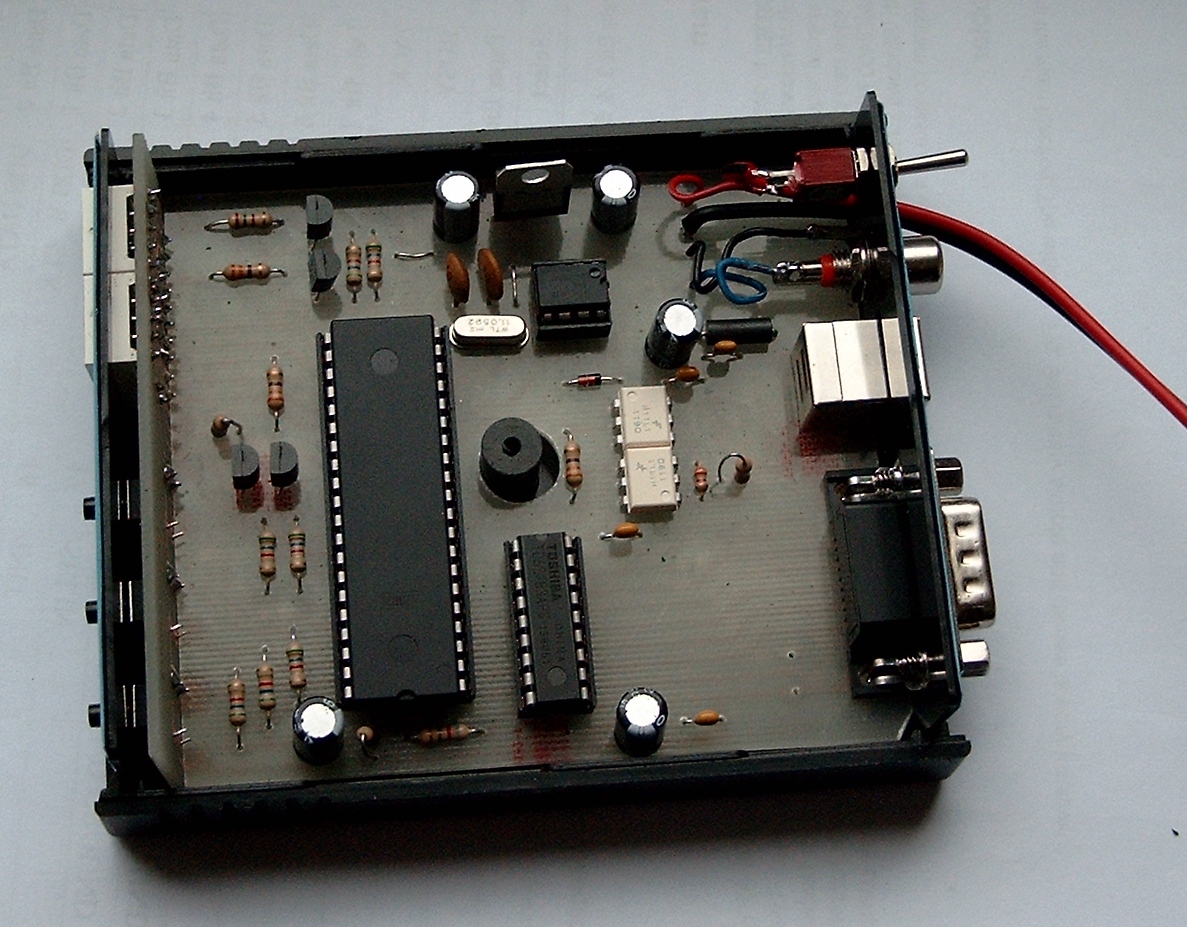
On the back side we have the PTT socket for connecting the control transmission of the TRX-a, required if you want to transmit on a different antenna than to receive, USB port for control and programming of the computer, DB9 socket to connect the antenna switch on the roof, and power switch.
Socket SWITCH has 9 pins. When selecting an antenna No.1 on pin 1 appears 12V, the selected antenna No. 2 on pin 2 appears 12V and so on until the eighth. Pin No. 9 is the mass.
Operation from PC:
First, install the FTDI drivers and then connect the controller to a computer. When working with Logger32 in the "Setup bands & modes" in the aerial select the antenna for each band and the type of modulation, and then in the Antenna selector select the port COMxx. The controller must be switched the operating mode of the PC (lights an extra dot on the screen) and then click the "Open OTRSP serial port".”.

Programming from the contorller:
Press the M button and turn on power to the controller. The display will show us the two periods, which means that we are in the programming mode. Use the buttons to select the program number. Next press M. button switch to green colour and select the receiving antenna for the selected program, next press the M button and select the transmit antenna (red). Again, press M. and switch the again to orange colour - program number. The settings are saved only when the program is changed to another program..
Programming from PC:
In order for the program PGM1 to PGM24 assign any antenna transmitting and receiving, connect the controller into your computer, put it into the PC control mode, using any terminal software eg. Hyperterminal program it.

The program I recommend a free program Hercules. At the command line, type eg. PGM and click Send. The controller asks a question to enter the program number and the number of the receiving and transmitting antenna in one string and click enter. If you want to exit the program, type EXIT command and click enter. Typing the command HELP get a list of available commands.
HELP
Supported commands (typed in capital letters):
AUX10 - AUX18 Program number
?AUX1 - ead the current program
?NAME - name of controller
?FW - Wersja oprogramowania
?PGM - program list
PGM - program change
EXIT - exit
?PGM
program list
PGM=1 RX=1 TX=1
PGM=2 RX=2 TX=2
PGM=3 RX=3 TX=3
PGM=4 RX=2 TX=3
PGM=5 RX=5 TX=5
PGM=6 RX=6 TX=6
PGM=7 RX=7 TX=7
PGM=8 RX=8 TX=8
PGM=9 RX=1 TX=1
PGM=10 RX=1 TX=1
PGM=11 RX=2 TX=8
PGM=12 RX=2 TX=8
PGM=13 RX=4 TX=6
PGM=14 RX=6 TX=7
PGM=15 RX=8 TX=2
PGM=16 RX=2 TX=2
PGM=17 RX=4 TX=1
PGM=18 RX=3 TX=4
PGM=19 RX=6 TX=2
PGM=20 RX=8 TX=4
PGM=21 RX=7 TX=8
PGM=22 RX=1 TX=6
PGM=23 RX=4 TX=7
PGM=24 RX=6 TX=4
USB driver: http://www.ftdichip.com/Drivers/CDM/CDM20828_Setup.exe
OTRSP: http://www.k1xm.org/OTRSP/index.html
Schematic
PCB
Controller is available in store:
http://www.antenykf.com/